
Getting started
We are going to start by exploring:
Recording audio
Working with multi tracks
Mixing a voiceover, music and special effects
Two different work views:
Waveform
Multi-track
How do I record a voiceover in Adobe Audition?
Recording a voiceover
Waveform
It is important to remember this is a destructive editing area. Any edits you make to the audio are permanent, unless Command Z.
Select Waveform top left on the menu or File/Audio File
Sample Rate: 44100 standard for audio recordings, but 48000 for video. Higher if working with high fidelity music.
Channels: Mono is fine for voiceover, stereo for music etc
Bit Depth: Leave bit depth as default - 32 float. This will still allow us to do cool things with our audio without clipping it.

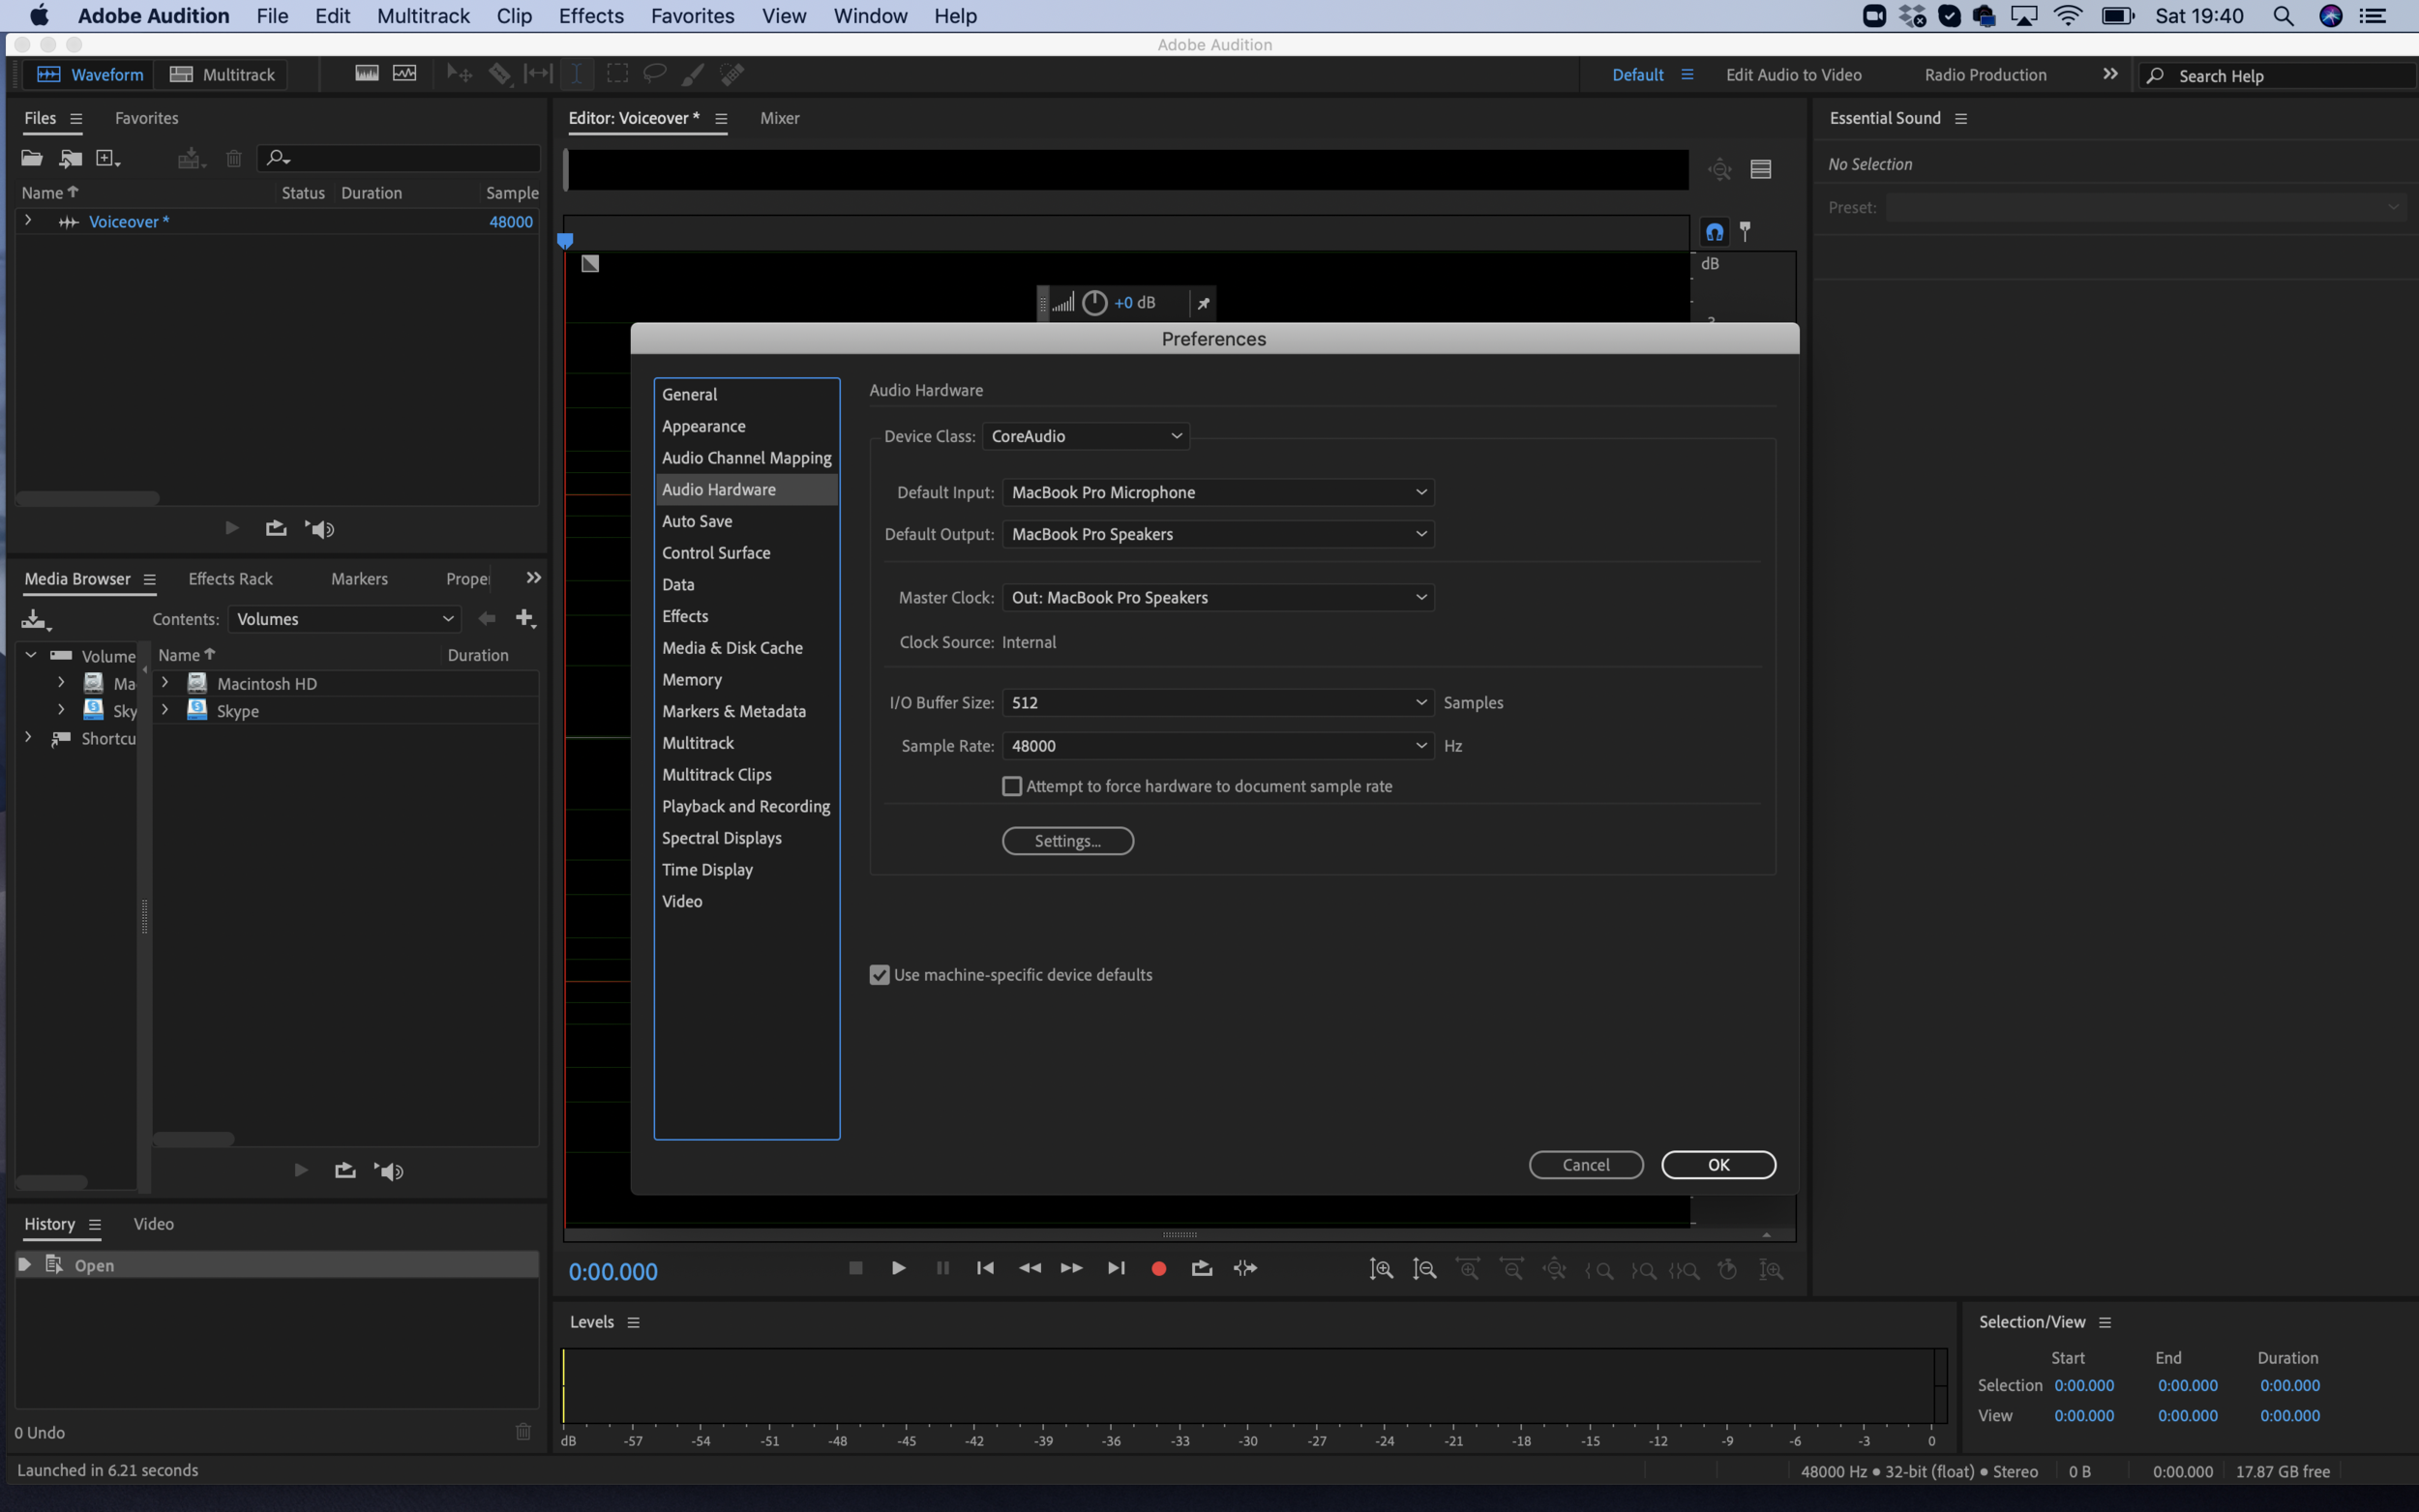
Next we need to make sure our audio interface is set-up correctly so that we can record.
Adobe Audition/Preferences/Audio Hardware.

Make sure the audio is being recorded through the channels you expect and is the audio channels are being mapped to where you expect. So I have no mixing desk attached etc, so will want my Macbook Pro speakers to be used.

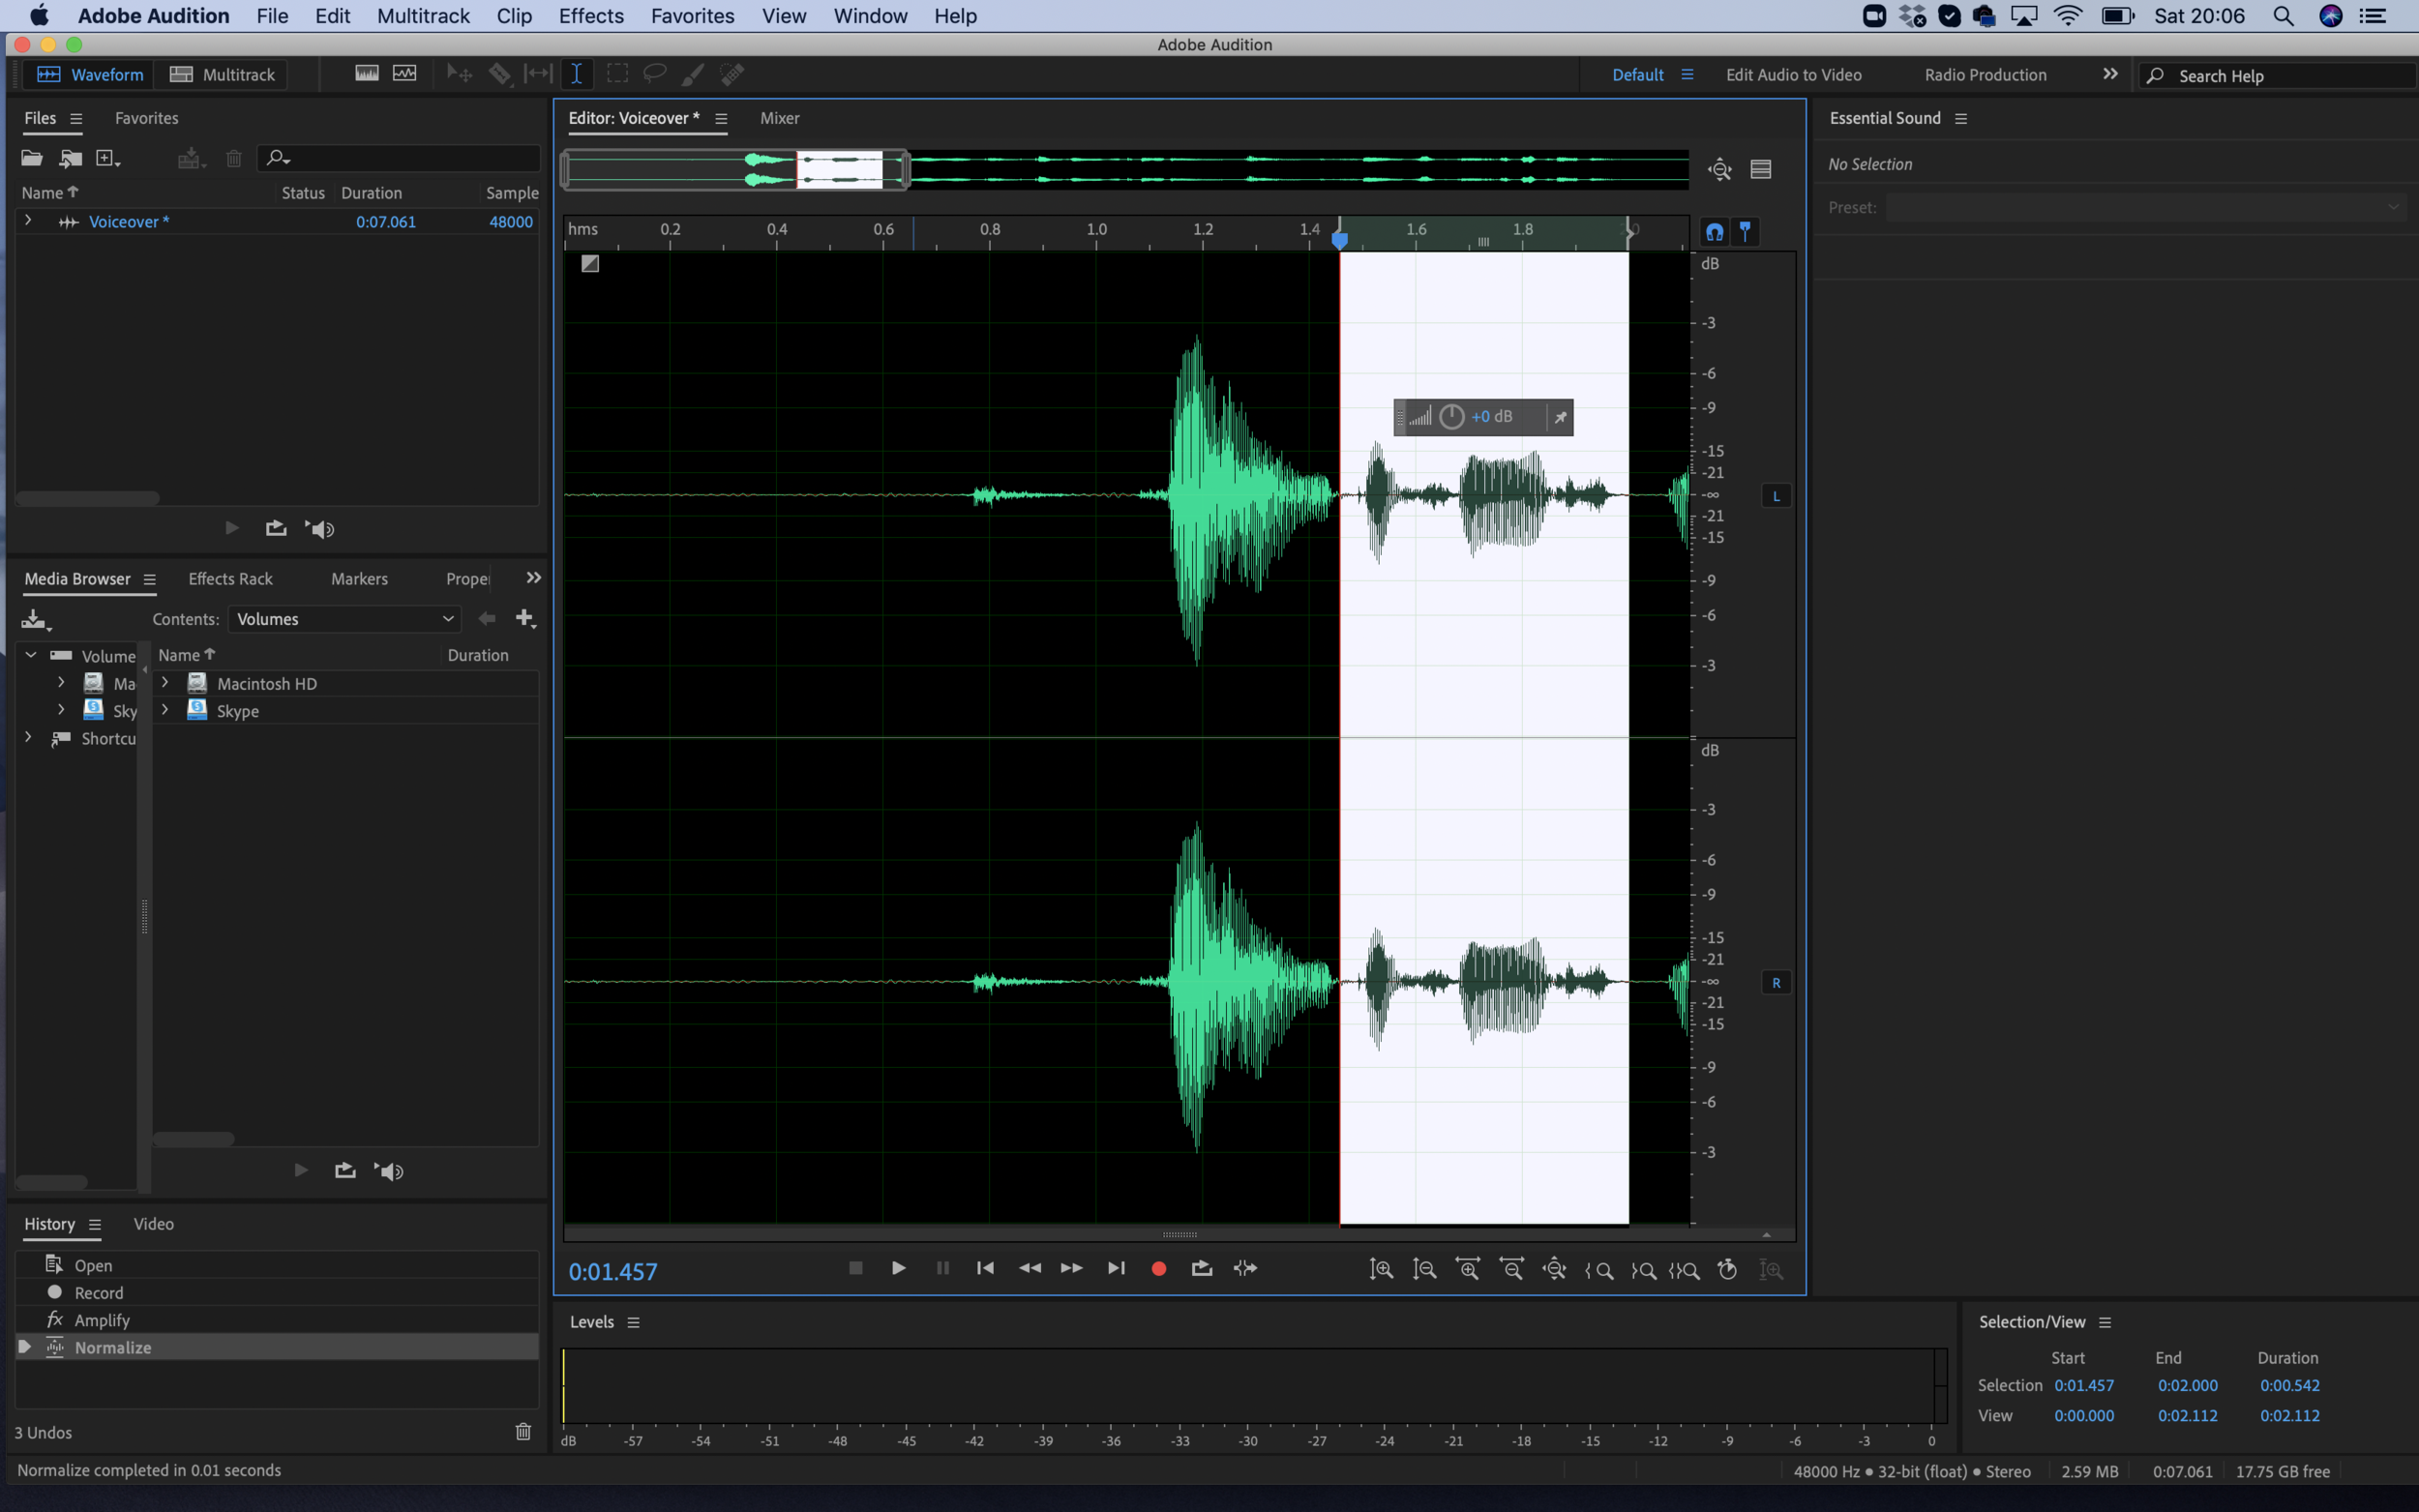
Now it is as simple as clicking the red circe (record) and recording your voiceover. Press space bar to stop recording.

Mind is a bit quiet - you would normally want it to be hitting the -3db -6db. You can increase the Amplitude, by using the volume heads up tool above the wave.

A quicker way is to Normalize the audio to -3db - Favourites/Normalize to -3db

Use the top white toolbar to zoom in and out of your audio. This is useful if you want to work on a small section. For example looping a section.
You can loop parts of your audio by selecting, and clicking on Loop Playback, next to the record button.

We tried lots of Effects in Audacity so let’s explore a few other ones in Audition. For example:
How do we apply Modulation in Audition?
Choose your presets

You can play around with the number of Voices, Delay Time, Delay Rate, Feedback, Spread, Modulation Depth and Rate.

Multi-track view
This is a non-destructive editing view - do not save any edits, trims etc to the individual audio tracks.

Give the session a name, keep template none, same sample rate as your voiceover 48000, bit depth 32 (float), Master Stereo.


Let’s start by dragging our voiceover onto track one. Select and drag and drop onto the track. You can choose where in time you drop the track.

You can zoom in, and trim tracks.

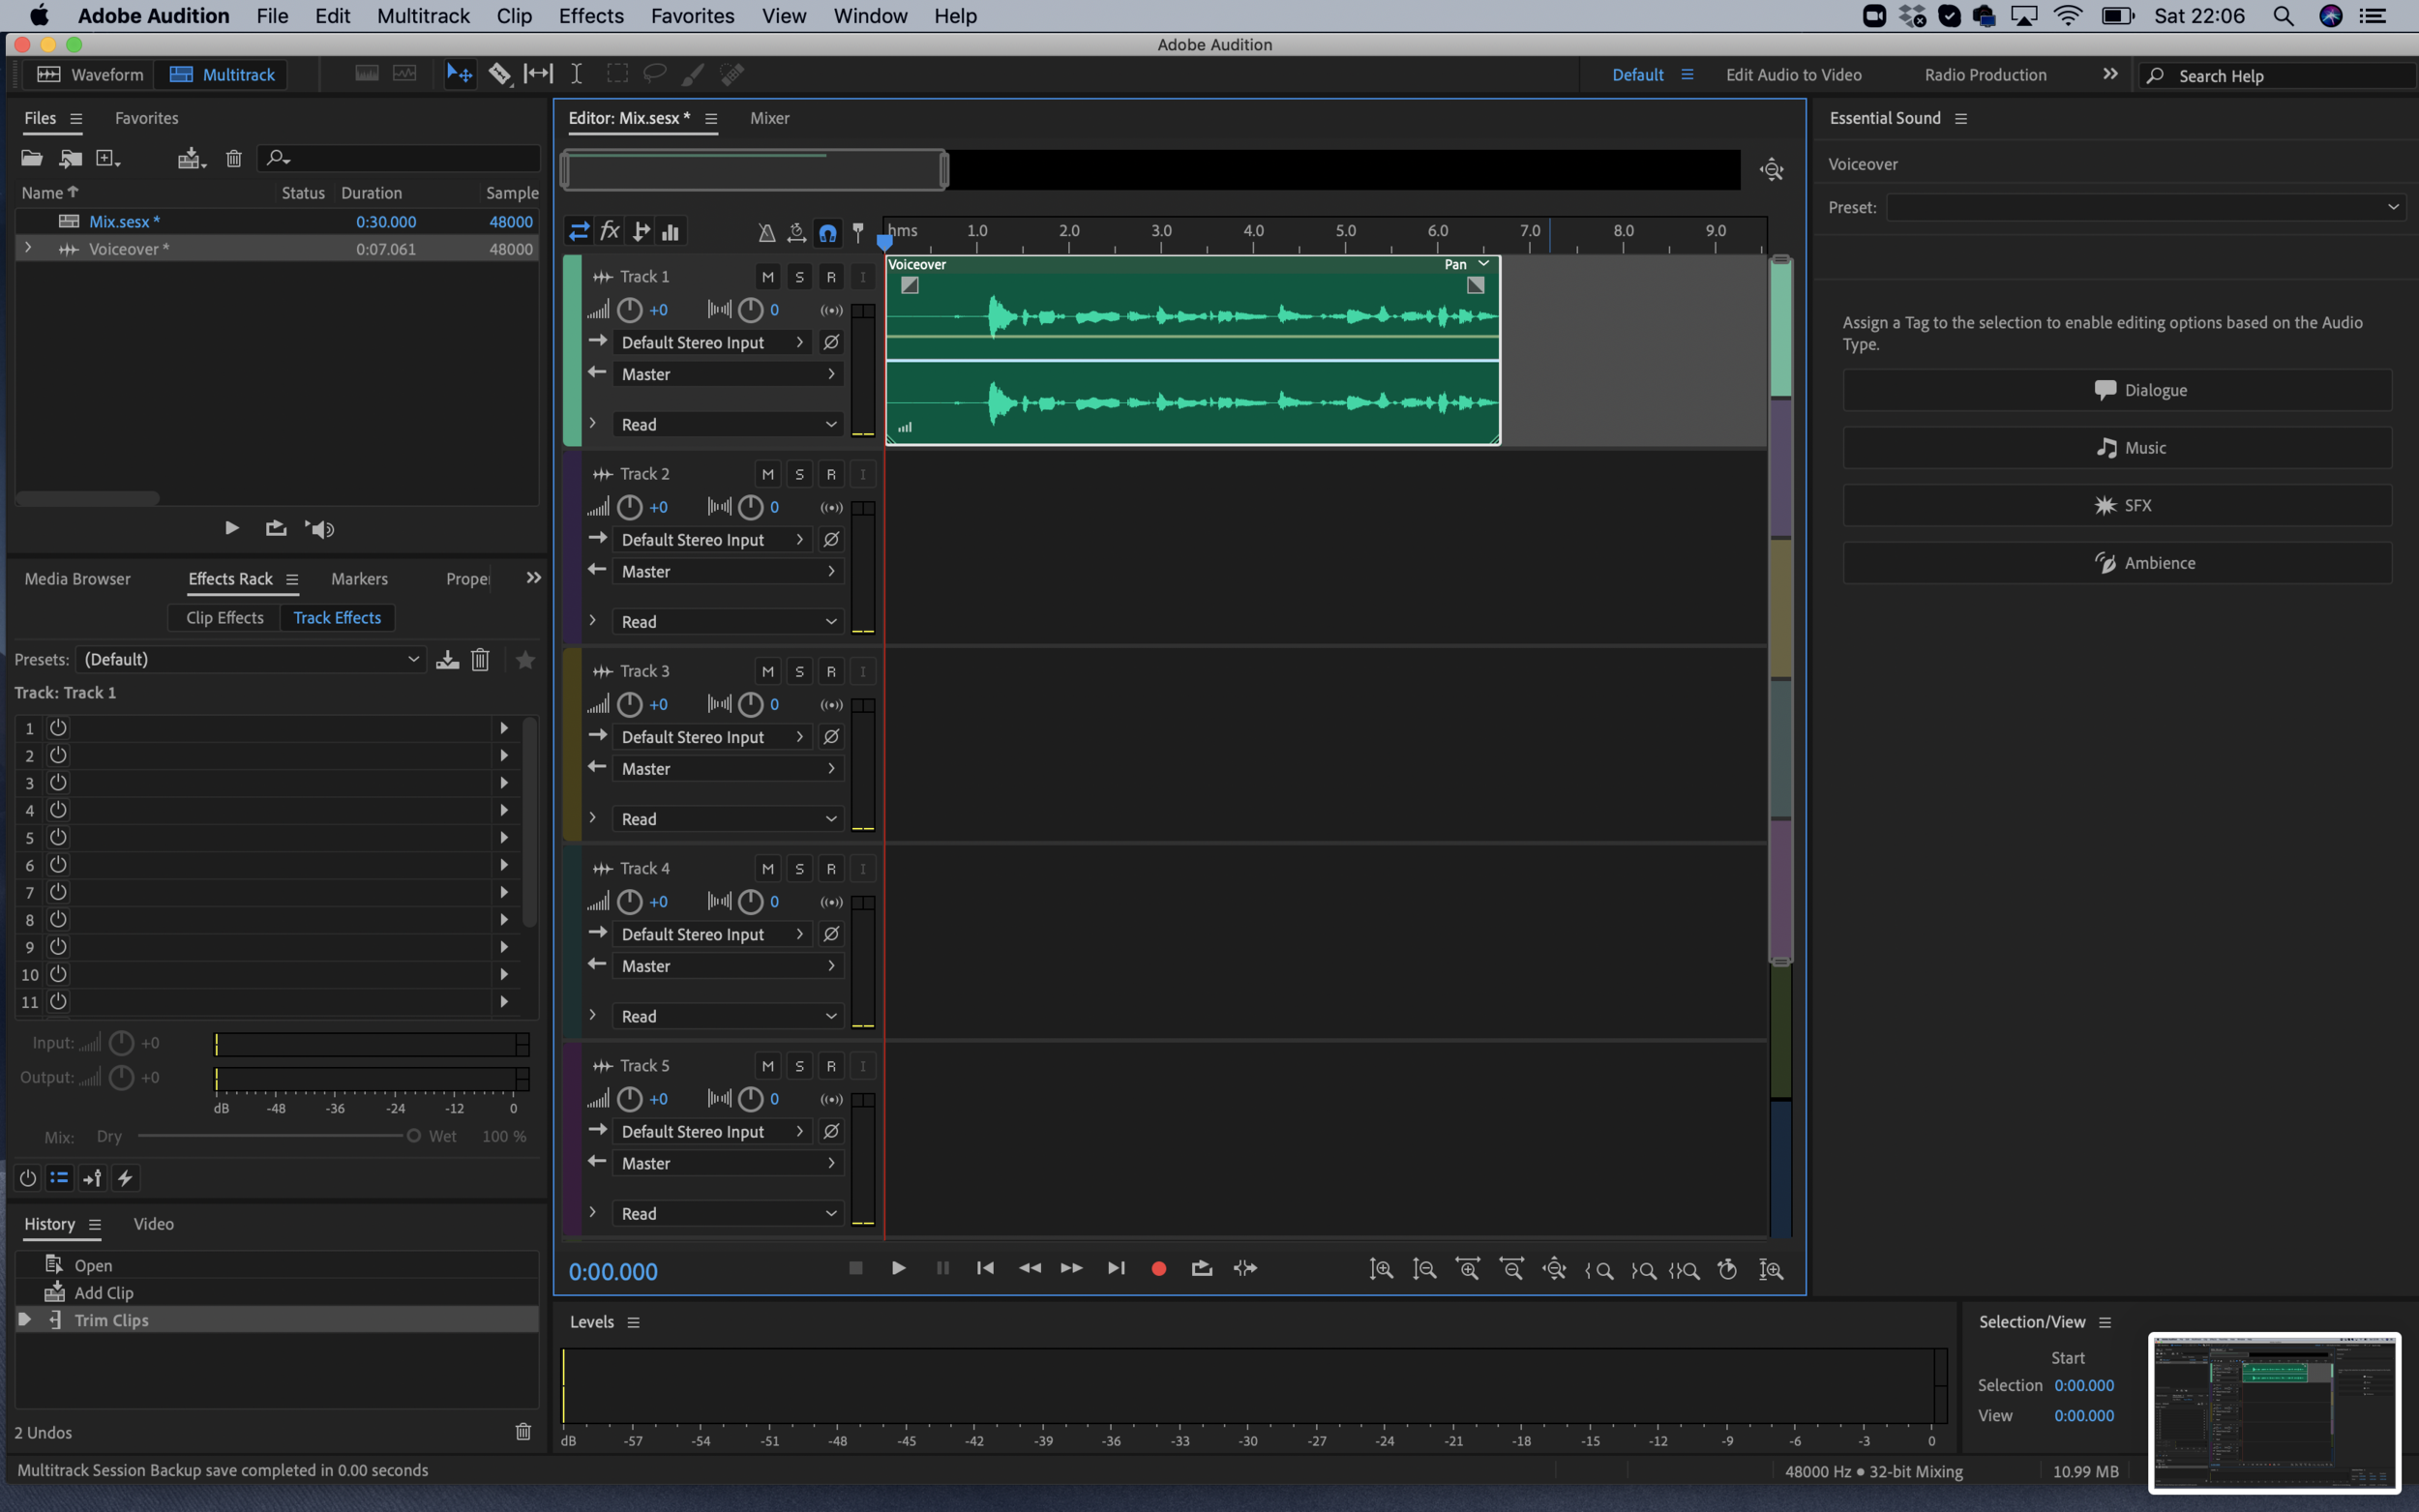
You can use the grey triangles at the beginning and the end of the track to have a fade in/out

Now we will start adding new tracks.

You can add points onto the yellow line to change the volume in parts.

You can use the standard Command C and Command V to copy parts of your audio to new tracks.


To apply Effects - use Effects Rack. This will allow you to apply effects to one track or all. I have put an Echo on to create a Spooky effect.

Like Photoshop, Audition shows your History.

We are now going to save this mix, by selecting Multitrack/Mixdown Session to New File/Entire Session.

This will take you back to the Waveform workspace.

You can save to many different formats but we will save to WAV.
